Every busy hallway has its battle scars. The zero-trace technique offers a calm, low-cost way to erase a door-handle dent without clutter or stress. With a few simple steps, you can restore a smooth surface that blends in.
Why the zero-trace technique matters for busy homes
Door impacts happen after a rushed morning or an overexcited game. Families and renters want a fix that is discreet and affordable. This approach aims for minimal material, less mess, and a finish you can live with. As a result, it suits tight schedules and shared spaces.
Instead of stripping paint or replacing panels, this method targets only the damaged zone. You calm fibers, level edges, and blend color where needed. The zero-trace technique prioritizes small, controlled actions that limit new marks. Thus, you protect the door’s structure and your weekend.
Results depend on the door’s material and the depth of the dent. Solid wood may respond to gentle steam that re-inflates crushed fibers. Painted MDF or hollow-core panels often benefit from a light fill and sand. However, veneer and laminate need special care to avoid lifting or bubbles.
« Small, careful steps beat heavy sanding when the goal is an invisible fix. »
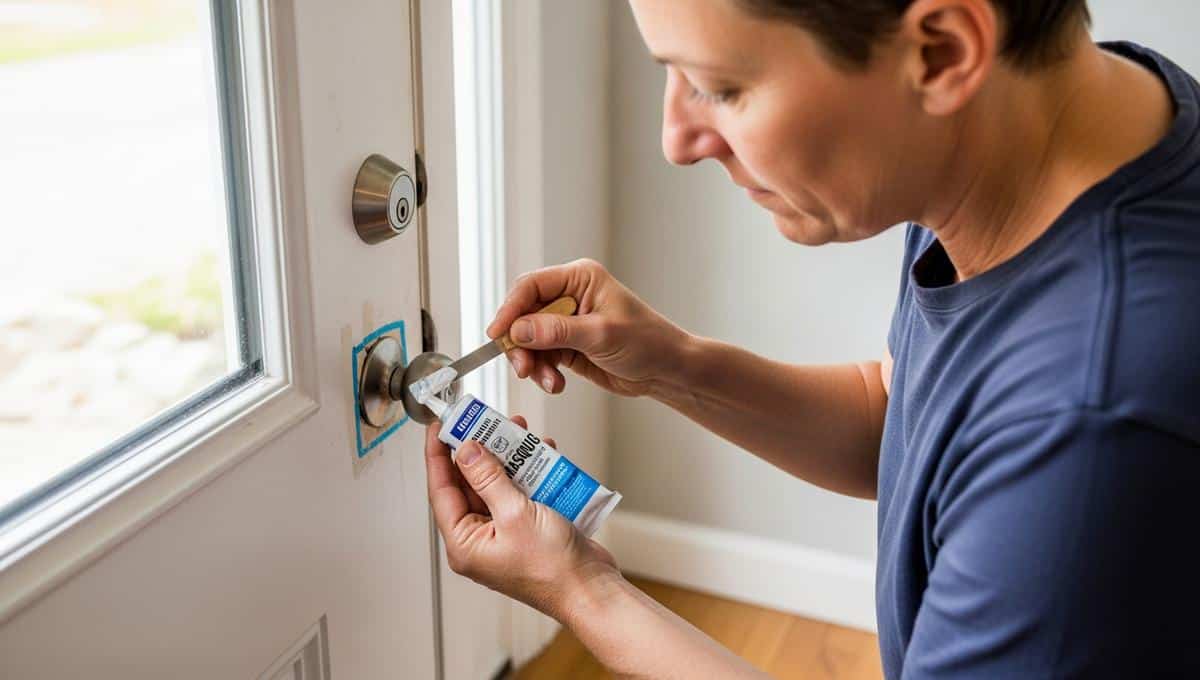
What you need to start the zero-trace technique
Gather a soft cloth, mild cleaner, painter’s tape, and a small putty knife. A household hair dryer or a steam iron with a damp cloth can help in brief bursts. Keep a small tub of multipurpose filler, a fine brush, primer, and matching paint. Above all, work with patience and good light.
To readHydrangeas covered in blooms this spring start with one simple winter pruning stepSet realistic expectations before you begin. Light dents near the latch or handle plate are good candidates. So are scuffs that flatten wood fibers rather than tear them. For deeper craters, the zero-trace technique may need a touch more filling and time.
- Test methods on a hidden edge before the visible area.
- Tape a small perimeter to protect clean paint lines.
- Work in short passes and reassess after each step.
- Ventilate the room and wear a dust mask while sanding.
- Color-match paint in daylight for best blending.
Step-by-step repair for common doors
Sandpaper — medium grit (120) (Sandpaper; variants: fine grit 180 or 240)
Use medium grit to level edges, then switch to a finer grit for smoothing.
Start with a gentle clean. Remove oils and dust, since adhesion depends on that foundation. On solid wood, place a damp cloth over the dent and apply a warm iron for 3–5 minutes in quick taps. Then let fibers relax, check progress, and only repeat if the surface is still low.
On painted MDF or laminate, skip steam. Instead, scuff lightly around the crater and press in a thin filler layer. Keep each pass small; therefore, drying is faster and sanding is easier. When flush, prime that patch and feather in 1–2 coats of touch-up paint.
Safety checks and when the zero-trace technique can wait
Confirm the door’s type before heat or moisture. Laminate can blister, and some veneers are thin. If you suspect older paint, consider a lead-safe approach for surfaces from before 1978. In that case, seek guidance and avoid dry sanding.
Call a pro if the impact exposes the honeycomb core or splits a stile. Fire-rated or apartment entry doors often have rules. Therefore, repairs may require approved materials. When in doubt, document the damage and ask your building manager first.
Finishing, prevention, and care
The miracle filling product — (Filler)
A smooth, ready-mixed filler helps level micro-craters fast; let it cure 30–60 minutes before sanding.
Feather sanding outward reduces a “patch halo.” Then prime the spot, not the whole panel. Match sheen as well as color, since gloss levels change the look. In addition, a small foam roller can mimic many door finishes.
To readOutdoor materials that age badly and waste your money: 5 to avoid in 2026Prevention saves repeat work. Add a discreet doorstop or a soft bumper behind the handle. Keep hinges tightened to reduce sway and shocks. Finally, routine cleaning and quick touch-ups keep the zero-trace technique effective over time.
Crédit photo © DivertissonsNous